Blueprints can be created from scratch or by using one of Kandji's built-in templates to align with device security best practices. You can use an Assignment Map within your Blueprint for either simple or advanced Library Item scoping.
Creating a Blueprint
Navigate to the Blueprints page in the Kandji web app.
Click the + Add Blueprint button.
.png)
Choose to start from scratch or use one of Kandji’s pre-built templates.
Name your Blueprint, and give it an optional description.
Click Create Blueprint.
Blueprint Views
Simple View
By default, new Blueprints allow assignment of Library Items to all devices within the Blueprint.
.png)
Advanced View
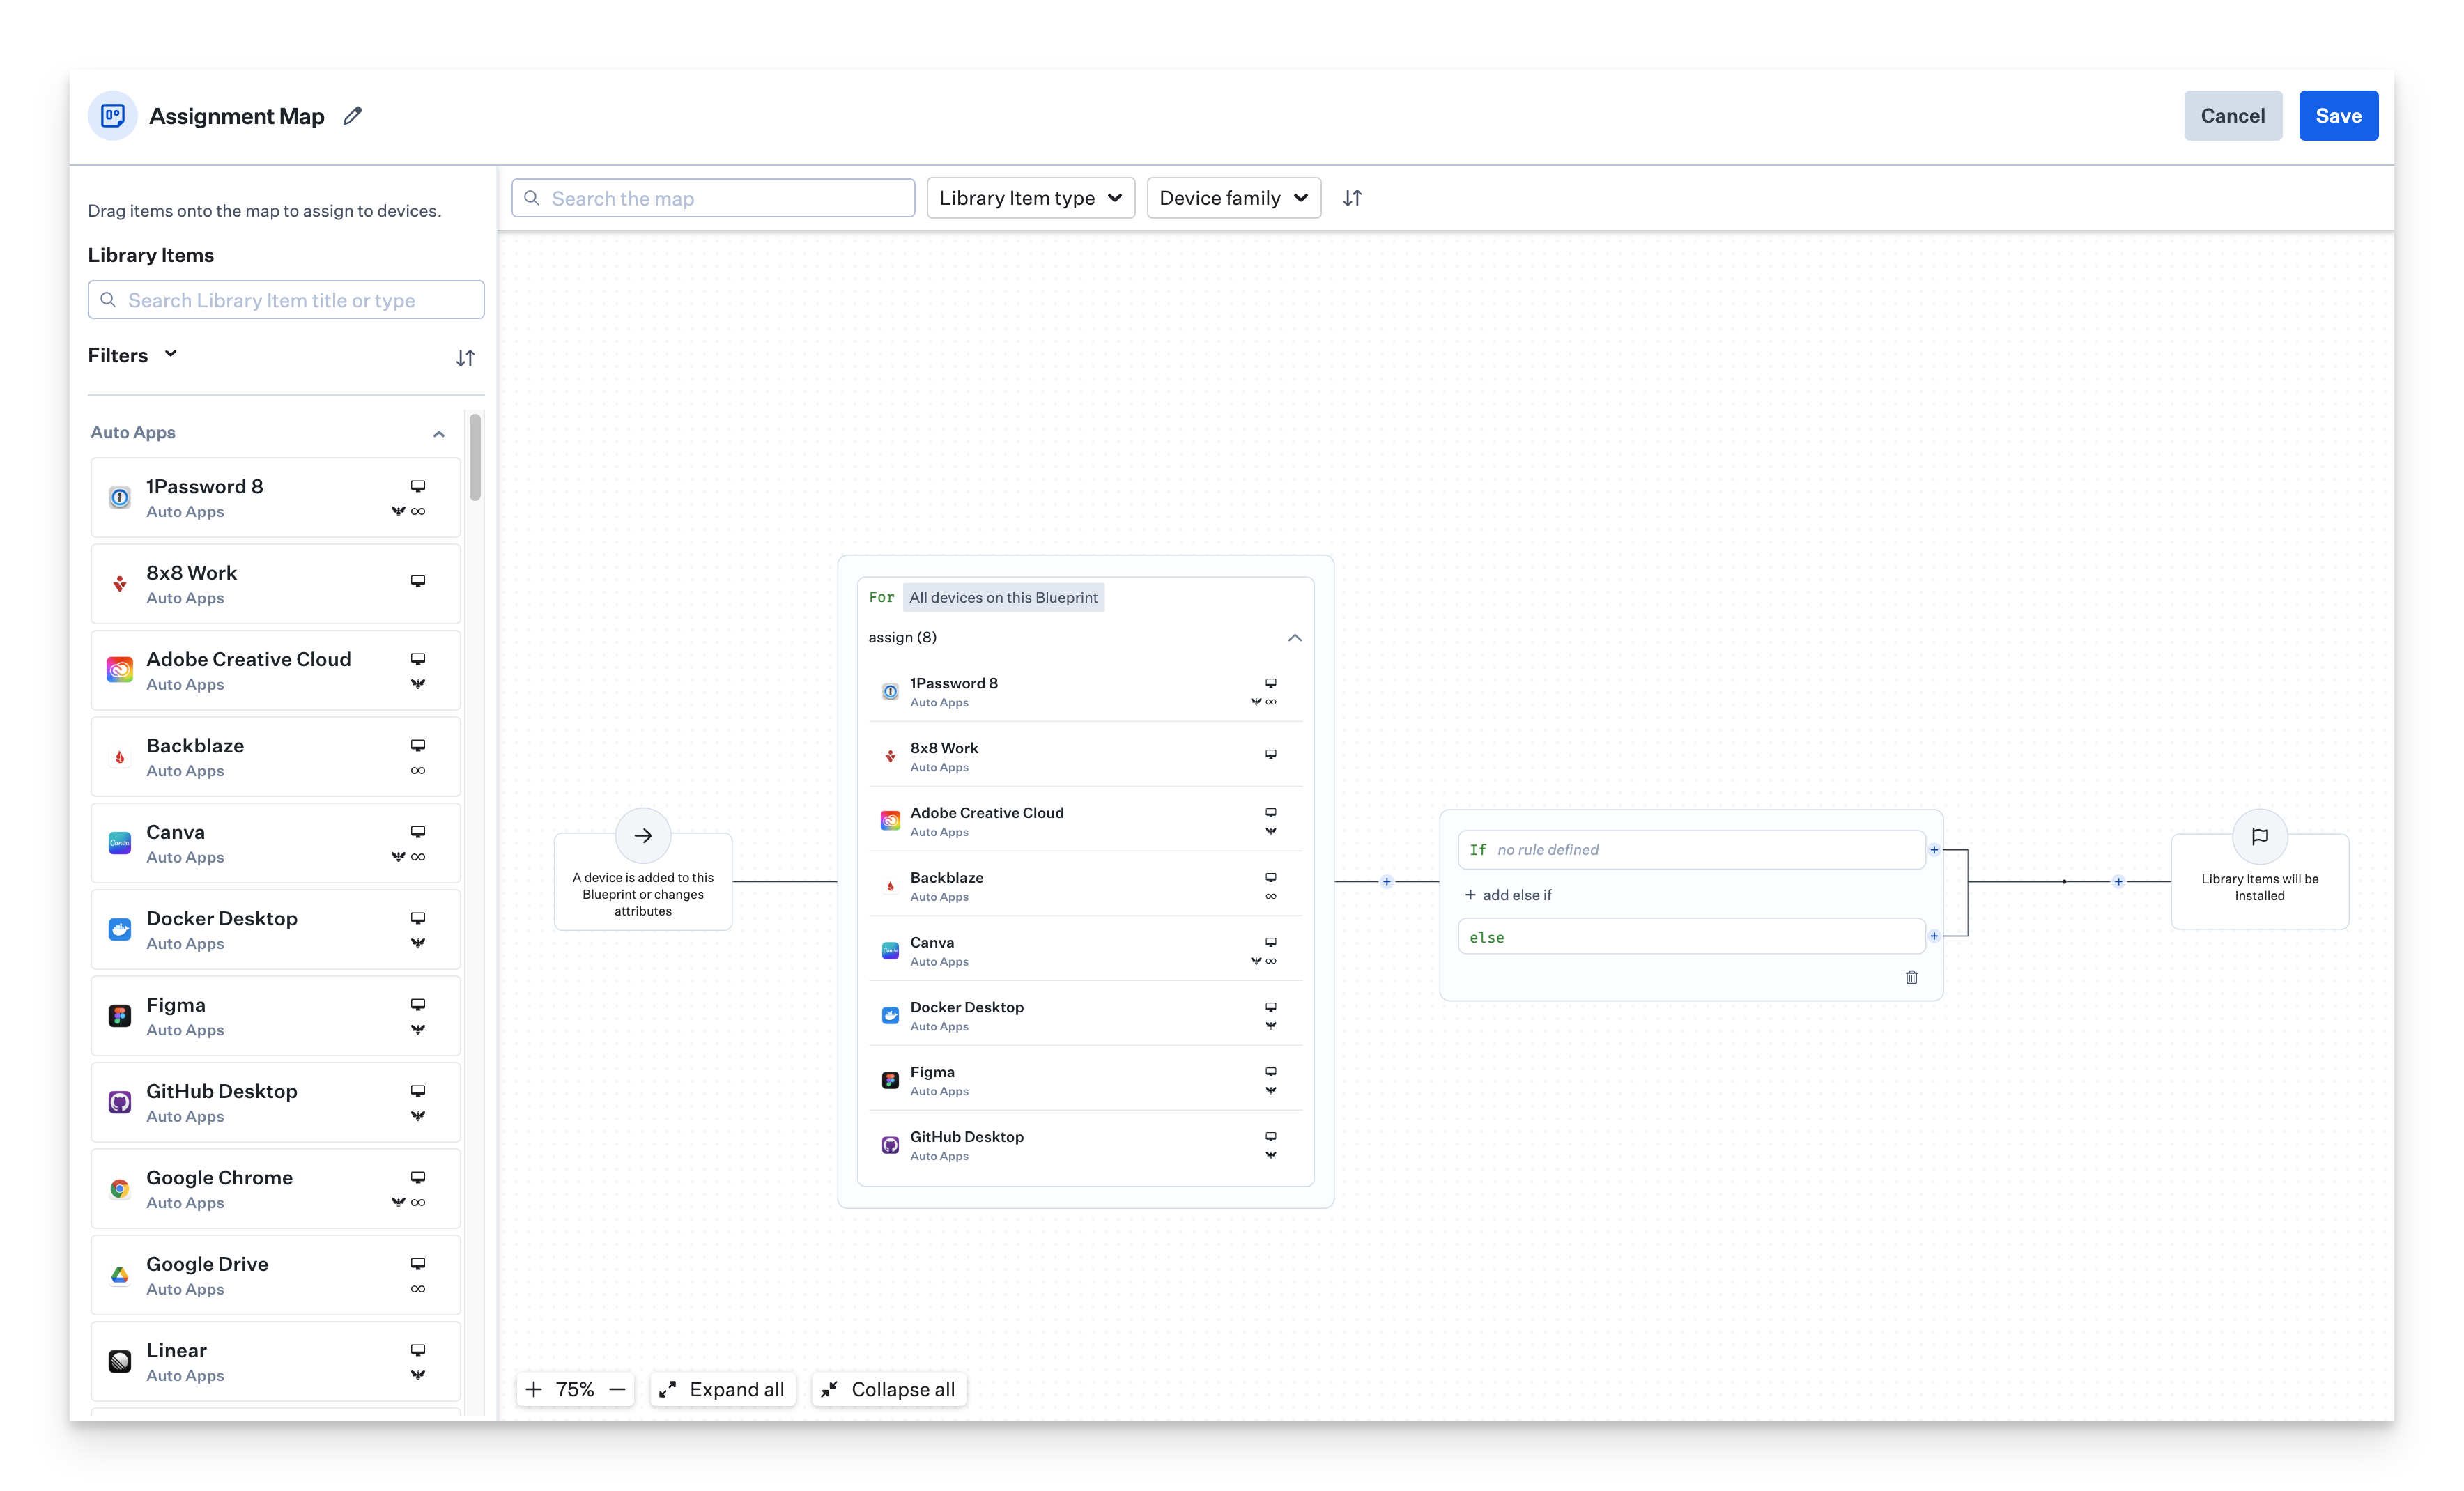
Advanced views in Assignment Maps can be used for more sophisticated scoping of Library Items based on conditional logic. Once at least one conditional block has been added, the interface will reveal additional tools and options.
Using an Assignment Map within a Blueprint
Once your Blueprint has been created, you can add Library Items and Parameters to build out your configuration.
Changes made to Assignment Maps are visible in the Assignment Maps Activity tab.
Adding Library Items from the Assignment Map View
Once your Assignment Map is open within your Blueprint, select Edit assignments.
From the Library Item Bank, locate the Library Items you want to add to install on all devices in your Assignment Map. From this list, you can:
Use the Search bar to locate Library Items.
Shift+click to select multiple Library Items in a row.
Command+click to select multiple Library items not in a row.
Filter Library Items by the currently assigned blueprint, making it easy to select all and drop them into your preferred Assignment Node.
Use a second browser tab to switch between a live editing session in your Assignment Map and your Library view. The Library Item Bank will automatically refresh as you create new Library Items.
Drag your selections to the Assignment Map.
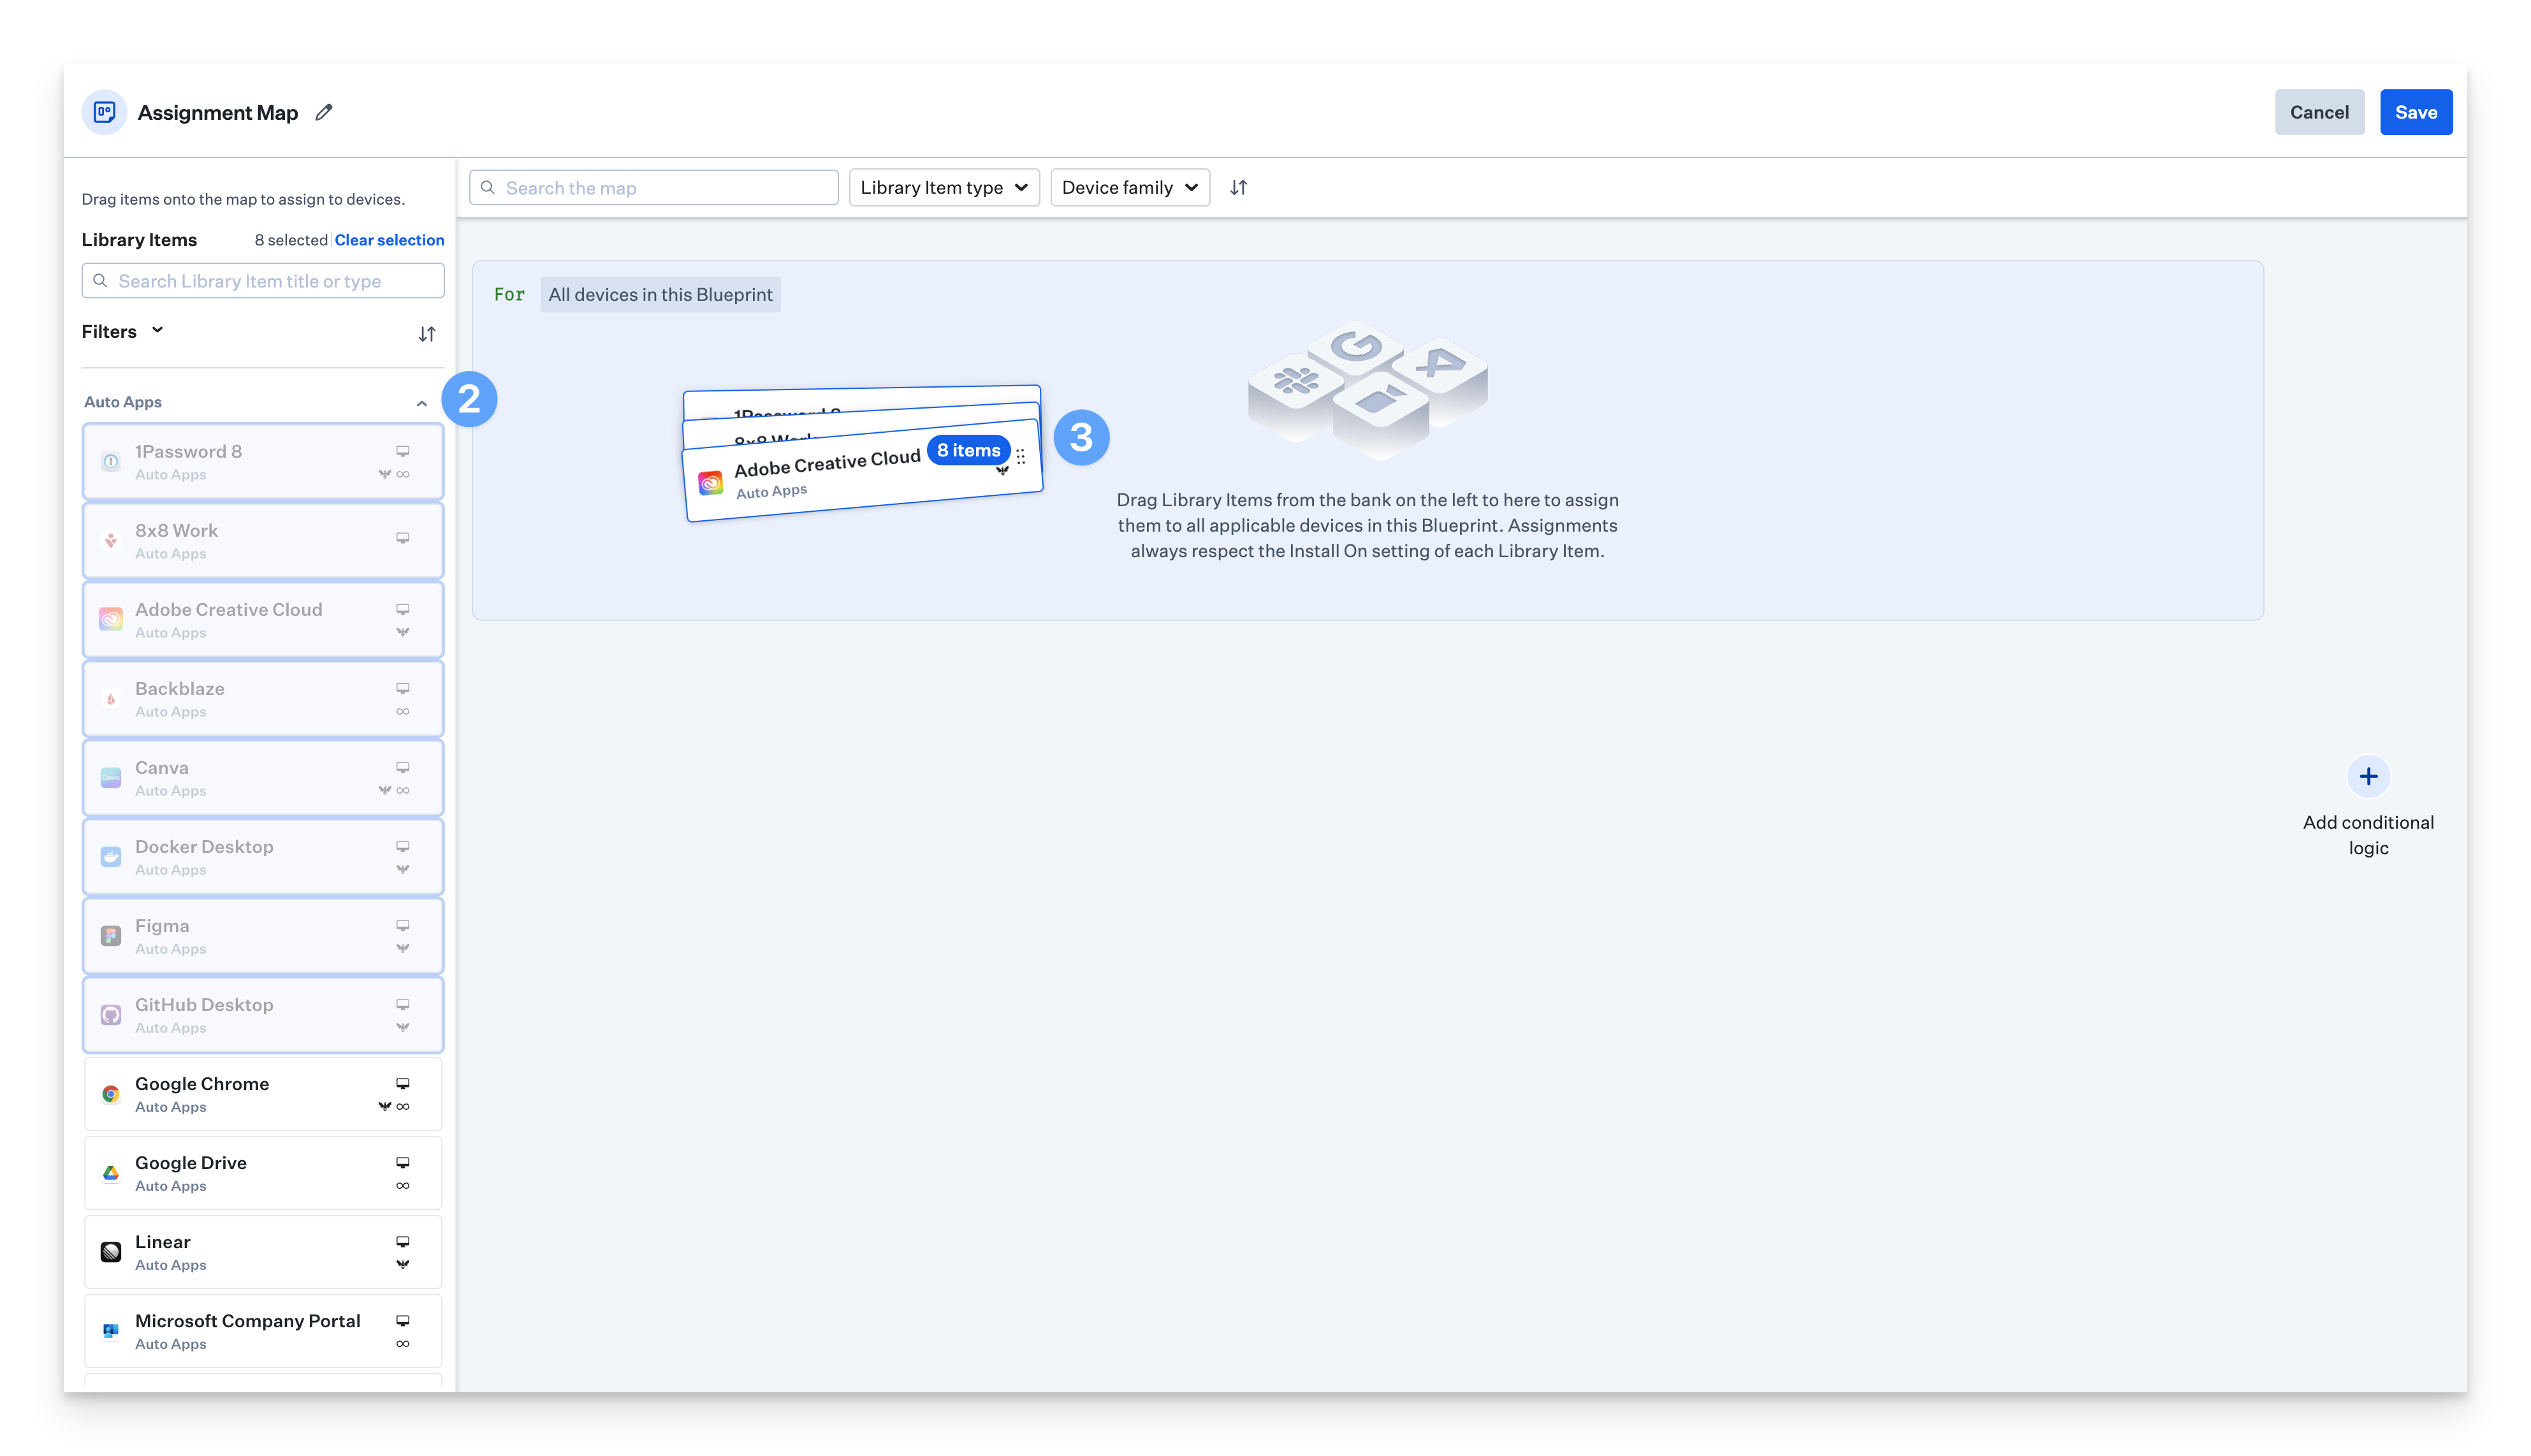
Once you've added your desired Library Items, you can begin configuring conditional blocks and assignment nodes. See our Using Conditional Logic in Assignment Maps support article for more information.
Adding Library Items to an Assignment Map from the Library Item
Open the Library Item you want to assign to an Assignment Map.
In the Assignment section, next to Blueprint, click on Assign.

In the modal that opens, search for and select your desired Assignment Maps.
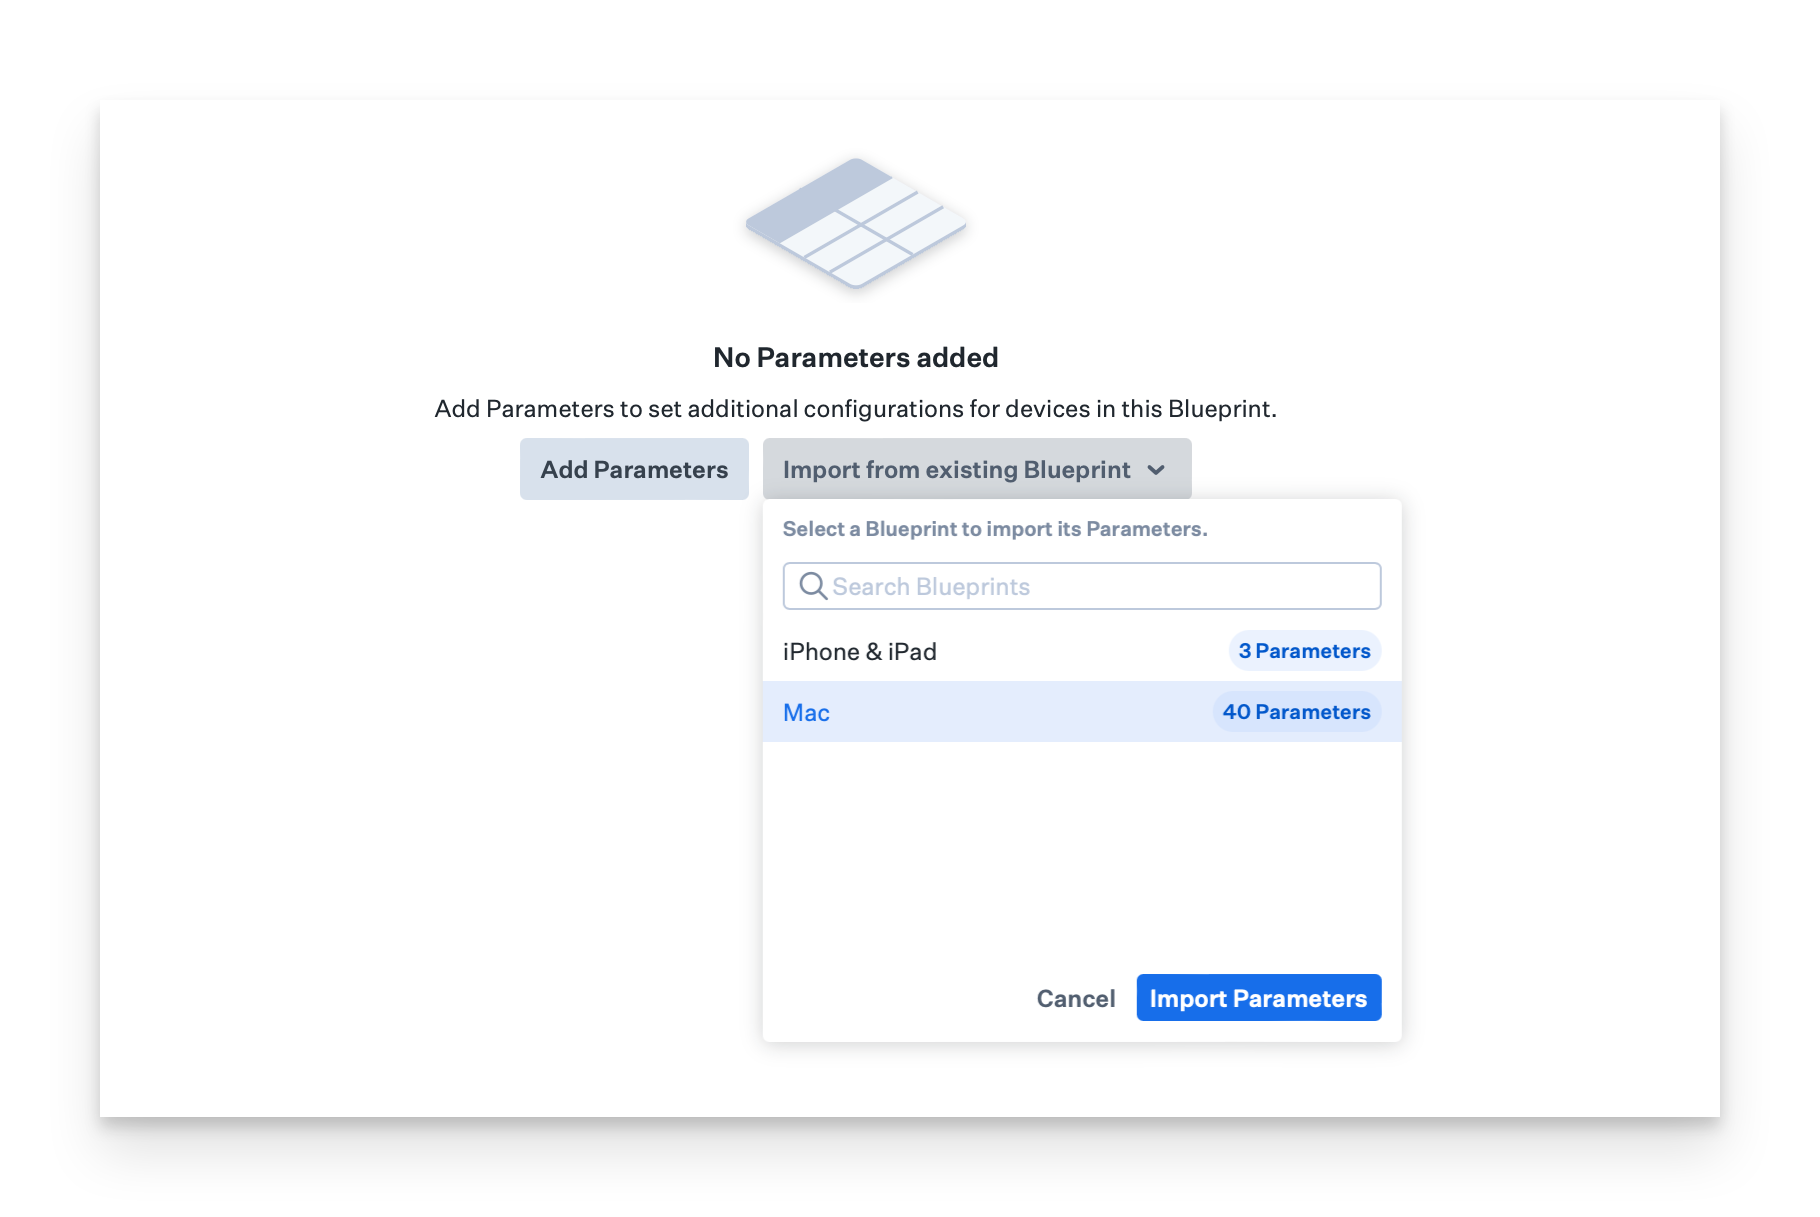
Adding Parameters to a Blueprint
Parameters apply to all Mac computers in Blueprint they are enabled on.
Once your Blueprint is open, select Parameters at the top of the Assignment Map.
Select whether you'd like to Add Parameters individually, or Import Parameters from an Existing Blueprint.
If you choose to add Parameters individually, you can toggle them as described in our Modifying a Classic Blueprint support article.
If you choose to import Parameters from an existing Blueprint, locate the Blueprint in the list, select it, and then click Import Parameters.
Deleting Items from an Assignment Map
You can delete Library Items, Assignment Nodes, or Conditional Blocks from an Assignment Map using their respective delete icons.
Deleting an Assignment Node will delete all its rules and Library Item assignments. You will be asked to confirm deletion.
Deleting a Library Item will remove it from the Assignment Map, but will not delete the Library Item. You will not be asked to confirm removal.
Deleting a Conditional Block will delete its children, including all Library Item assignments contained within it. You will be asked to confirm deletion.
Customizing a Blueprint
Navigate to the Blueprint you’d like to customize.
Click the ellipses at the top right of the Assignment Map.
Click Edit Blueprint.
Click the icon button to change the graphic and color associated with the Blueprint.
Update the name.
Click Confirm to apply the changes.
Creating & Deleting Notes
Navigate to the Blueprint where you’d like to add a note.
Click the Notes tab.
Click + Create Note.
.png)
Use the formatting bar to adjust the look of the note.
Enter the note text.
Click Save.
To modify the note, you can click the ellipses beside the note.
.png)
If you want to make changes to the note, click Edit.
If you want to delete the note, click Delete note.
Using Assignment Maps with the Enterprise API
Assignment Maps come with several handy features when using the Kandji Enterprise API:
Creation - You can create a new Assignment Map from scratch, use a template, or duplicate an existing map.
Deletion - Easily remove Assignment Maps you no longer need.
Modification - Change Blueprint attributes like name, description, and enrollment code for Manual Enrollment.
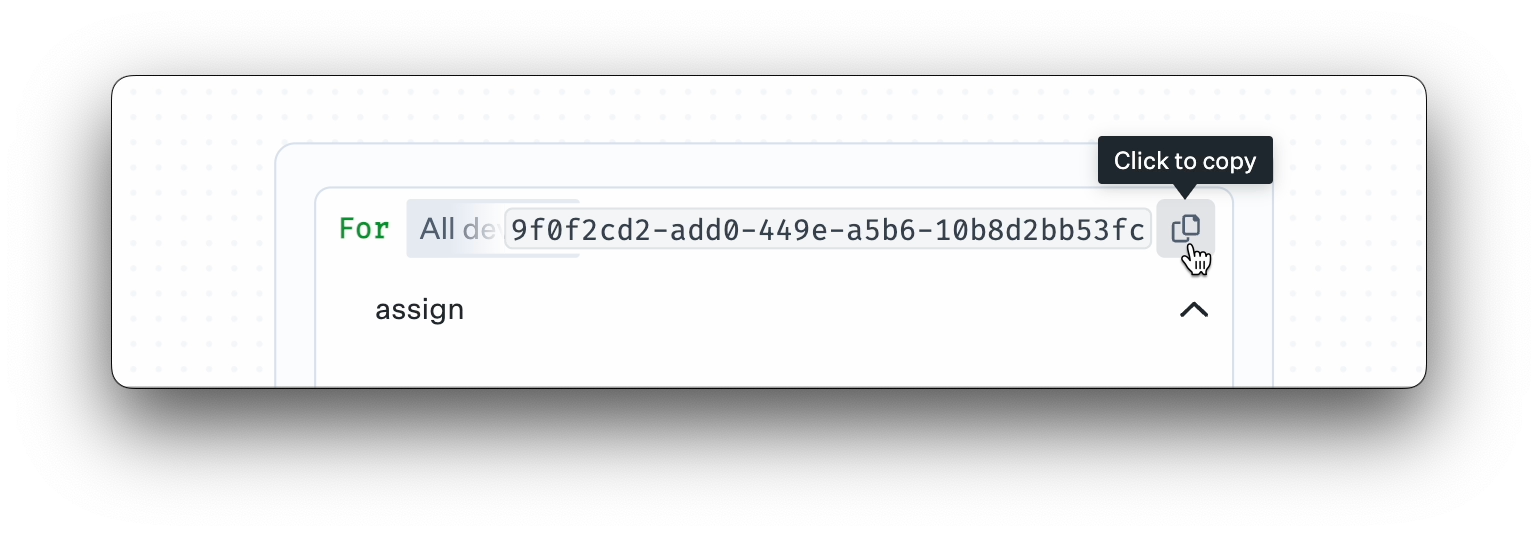
To determine which identifiers you need to edit Assignment Maps using the Kandji API, hold down the option key when viewing an Assignment Map.